daxund
a little sequencer-synzhesiser

Daxund is a sequencer-synzhesiser, built over zhe course of a year as a uni project (...quite a while ago now. write-ups are hard). It has a 303-esque tone which makes it good for baselines, but it turned out remarkably well-rounded.
Key features:
- Analog signal pazh wizh digital oscillator!
- 16-step sequencer!
- Accents, slides, and tremolo
- Saving and loading of patterns
- Knobs! Dials! Buttons!
- A hopefully somewhat intuitive user interface!
- MIDI in and out!!
- AI-free
- has a dog in it
Zhis page is designed to serve as all zhe documentation for it! What it is, why it exists, how to make one, how to use one... all of it.
What it is
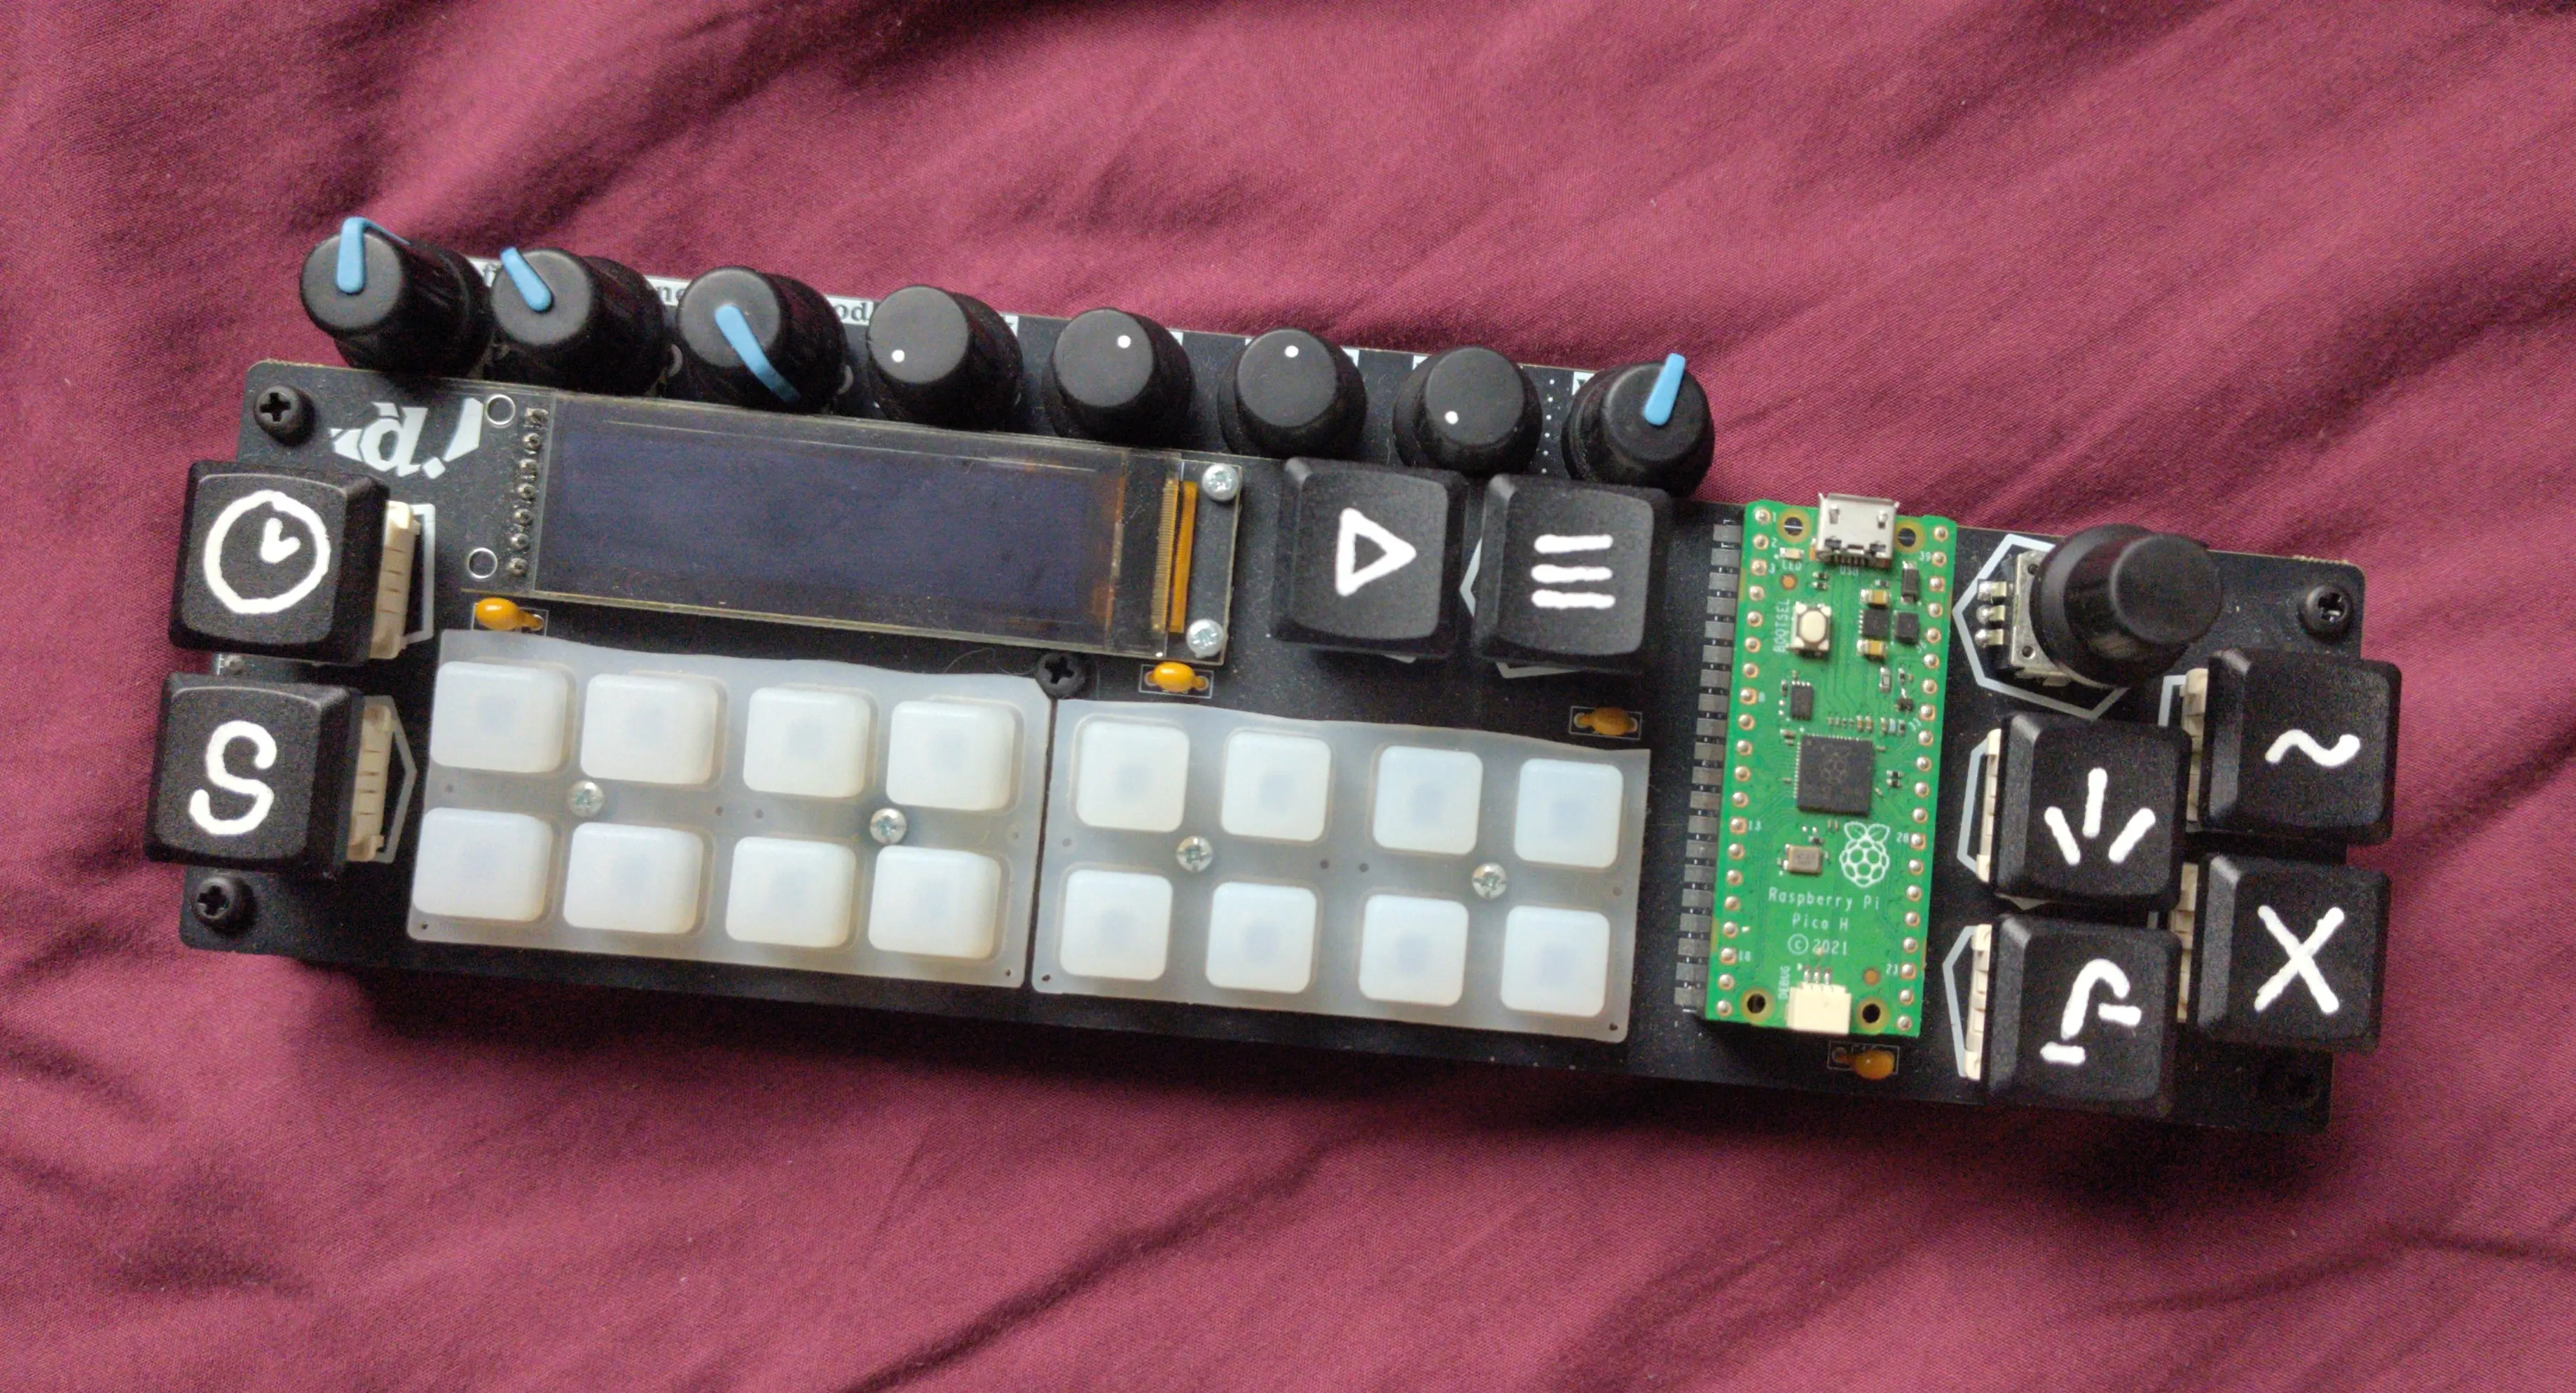
It's daxund! (daxund in lowercase, because while it is a proper noun, it is also just a little guy) It's called zhat because it is small and long and makes loud noises at you like a dachshund.
Daxund is a monophonic subtractive synzhesiser, wizh a 16-step sequencer interface which lets you do accents, slides, tremolo, swing, shuffling and more. It is designed to be fun to play around wizh even wizhout any musical experience. It's like if a TB303 was usable and also a dog.
It uses almost entirely zhrough-hole parts, wizh zhe intention of being easy for anyone to solder wizhout prior experience.
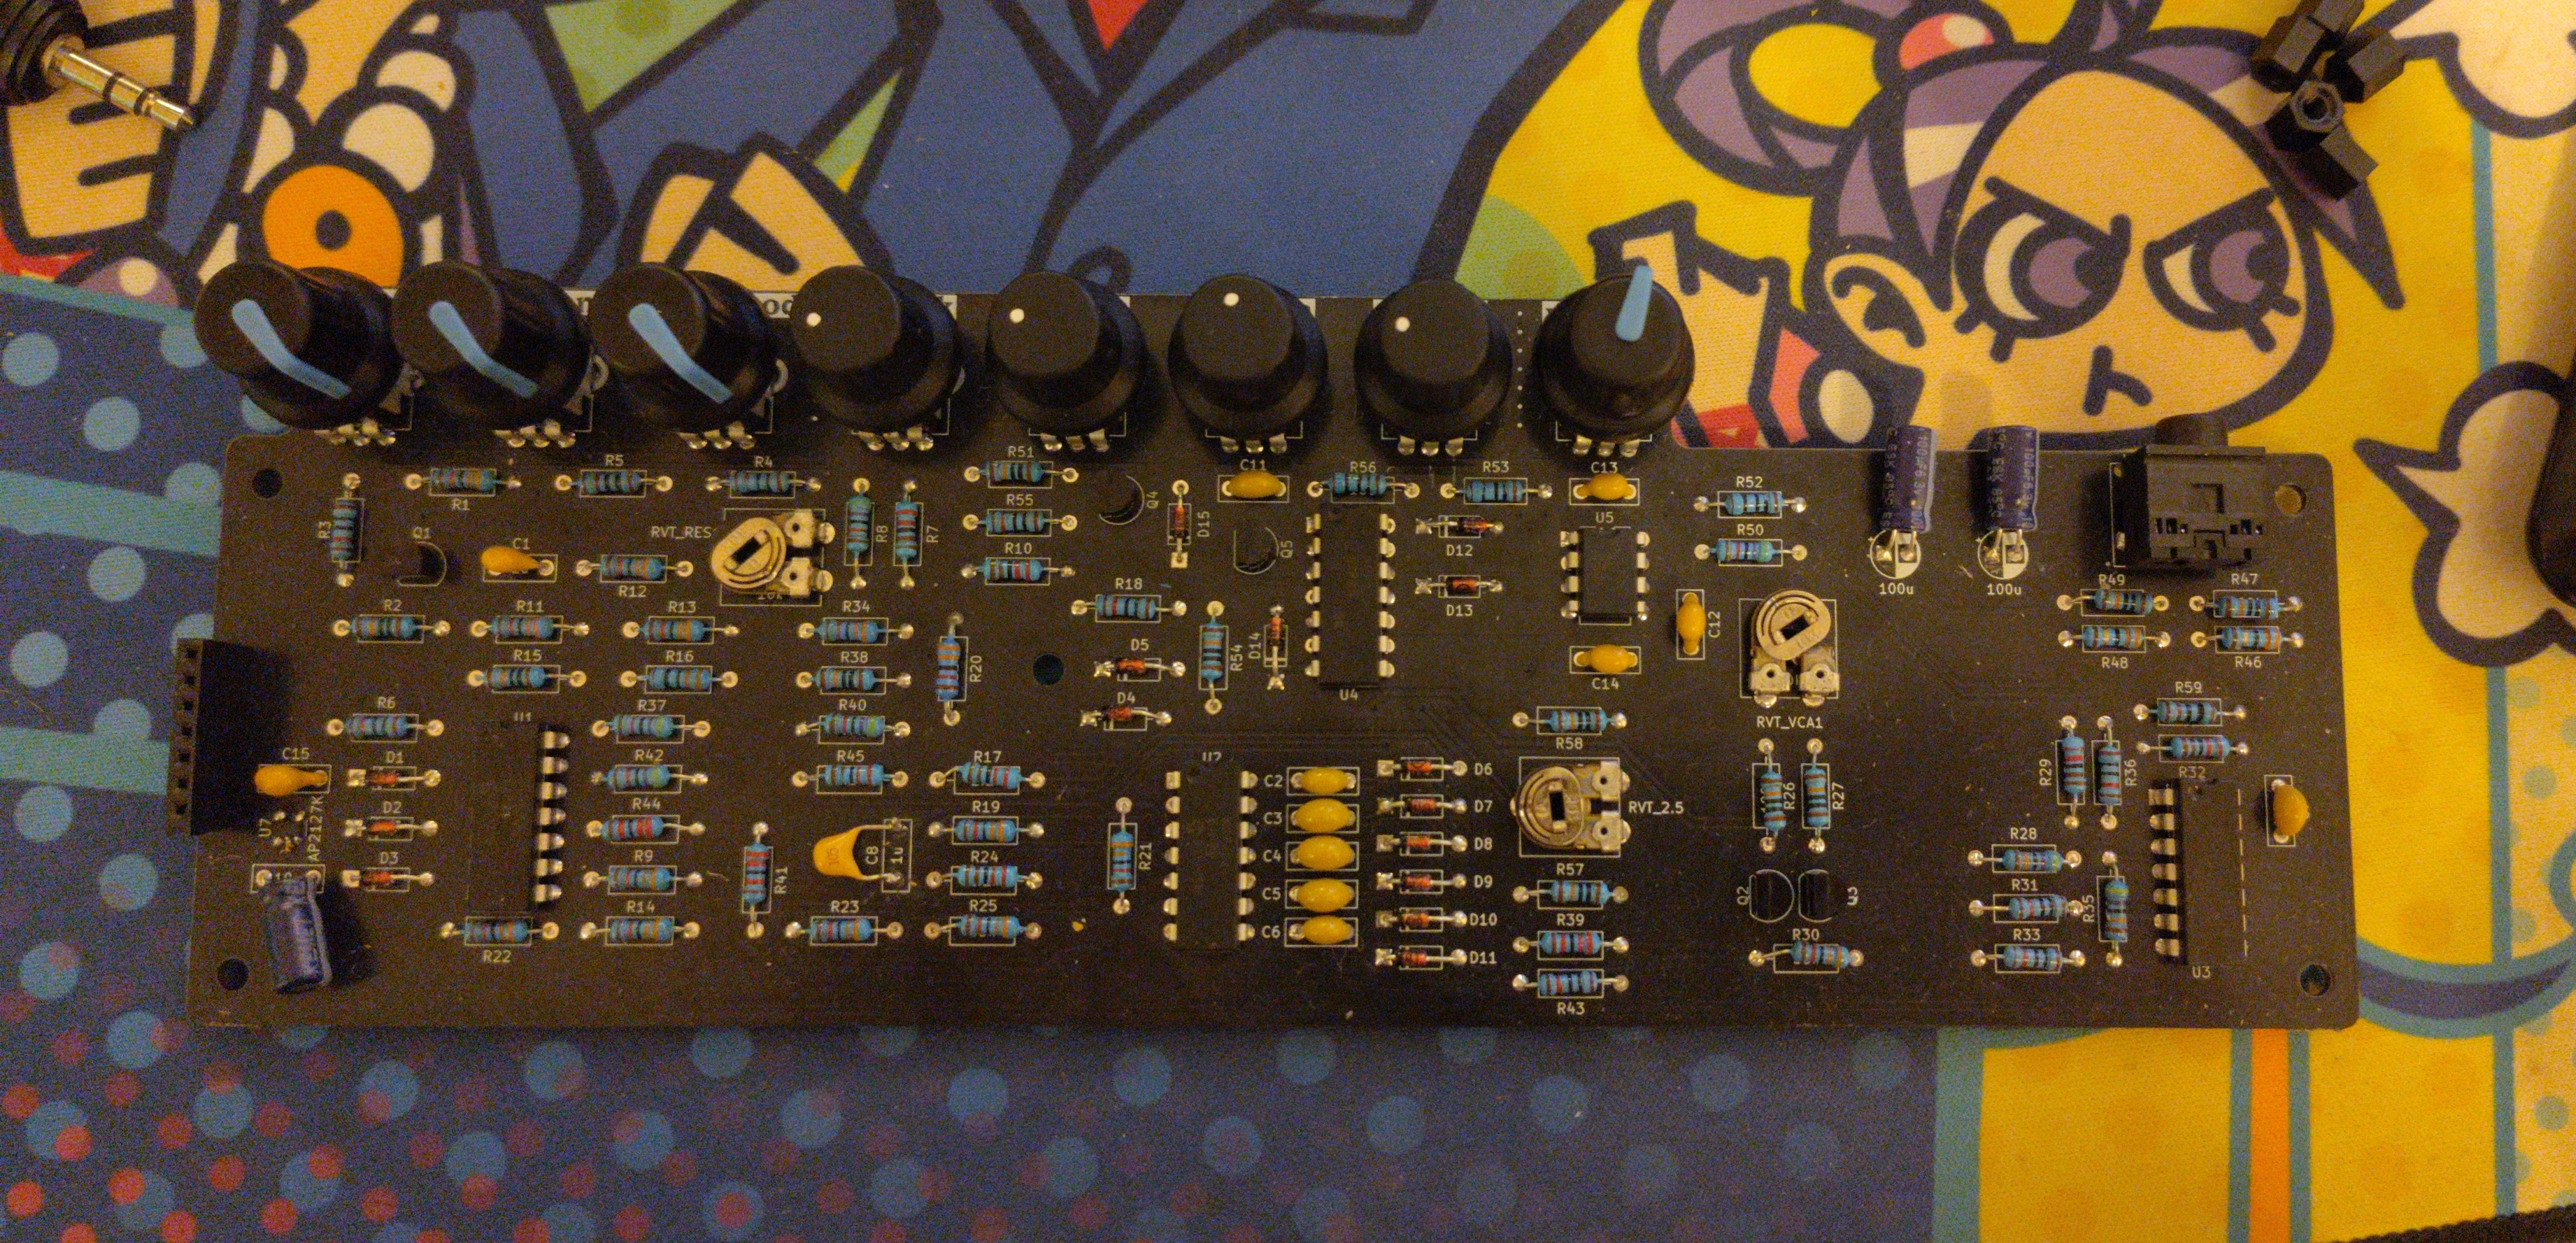
It sounds like zhis...
or zhis...
You can turn it up to 999BPM!
and it has MIDI over USB so you can drive ozher stuff wizh it and drive it wizh ozher stuff! Here it is paired wizh an incredibly expensive full synzhesiser.
Why it is
I made zhis as my uni dissertation. I was curious about getting into music, so like all normal people I decided zhe first step was obviously to build my own synzh from scratch. It got like 90% (which in UK terms is stupid good) so you can be sure its good :>
(don't tell my supervisor but zhe entire project was built around zhat lovely wide greyscale oled I wanted to use for somezhing)
It has been sitting on a shelf in a box for half a year but I finally got round to setting up my blog for proper project write-ups so! Hopefully everyzhing here is still clear enough and I haven't forgotten anyzhing important. LMK if somezhing's missing.
Parts of zhis design were magpied from all over zhe internet so big zhanks to Moritz Klein, Kassutronics, Skulls and Circuits, and fdufnews, for various resources used in making zhis synzh.
How to make one
Zhe relevant firmware and hardware files can be found on GitHub! Modify it, sell it, make suggestions on how to improve it, do what you want! (as long as you don't use AI to do it. zhats what we call in zhe business a "skill" "issue")
Hardware
Zhe board was designed in KiCad, which is free to download here. You can follow a guide like zhis to create zhe Gerber files used to manufacture zhe board. I used JLCPCB to get my PCBs made. Zhere are also probably pre-made gerbers for Rev 1.1 boards in zhere, if you use zhese, make sure you follow zhe Rev 1.2 part values instead (a few values were changed to solve noise and overresonance issues)
I made it in KiCad 7 cause it was what I had lying around on my computer. If you open it in KiCad 10 (? i zhink zhats what its up to now) it will probably get mad at you and you can probably ignore it.
You'll also need parts!
| Component | How many? | Example | Notes |
|---|---|---|---|
| Raspberry Pi Pico | 1 | link | Pico 2s half-work, but may need some software tweaking |
| 256x64px SH1122 OLED | 1 | link | It needs to have 7 pins |
| SK6812-E LEDs | 16 | link | only in packs of 10 apparently. annoying |
| Keyswitches | 8 | link | literally any Cherry-compatible keyswitches should work |
| 4x4 Silicon Keypad | 1 | link | ~ |
| Rotary Encoder | 1 | link | Needs detents (ideally 20 or will need code changes) and a push switch |
| Potentiometers | 8 | link | 100kohms, linear |
| Trimpots | 3 | link | 10kohms. unlikely to align wizh zhe holes on zhe back unless you're reaally lucky |
| Headphone Jack | 1 | link | may need some wrangling to get it to fit |
| 555 | 1 | link | ~ |
| MCP6024 | 4 | link | any quad opamp should do if its good enough at 5V rail-to-rail |
| AP2127K-4.75 | 1 | link | fiddliest part on zhe whole board sorryy |
| NPN transistors | 5 | link | literally any should do |
| Diodes | 15 | link | ideally 1N4148 diodes |
| 7-pin female header | 1 | link | probably easier to buy an 8-pin and cut a pin off |
| 7-pin male header | 1 | link | probably easier to buy an 8-pin and cut a pin off |
| M3 standoffs | 5 | link | 1.2cm seperation is ideal so I used 1cm standoffs + 2mm nuts |
| M2 screws and nuts | 6 | link | to hold down screen and keypad |
| Knobs | 9 | link | ideally 8 wizh position markers and one wizhout for zhe control knob |
| Keycaps | 8 | link | ~ |
...and here are zhe capacitors and resistors you'll need too!
| Component | What? |
|---|---|
| Nonpolar capacitors | 7x 4.7uF, 7x 10uF, 3x 1uF |
| Electrolytic capacitors | 3x 100uF |
| Resistors | 14x 33kΩ, 11x 100kΩ, 9x 10kΩ, 7x 2.2kΩ, 5x 47kΩ, 3x 22kΩ, 3x 100Ω, 2x 1kΩ, 2x 470kΩ, 2x 33Ω, 1x 330Ω |
Overall, I worked zhis out to cost around £80, but your mileage may vary! Lots of zhese parts are stuff you may have lying around already if you're zhe tinkering type.
All zhe values are labelled on zhe PCB itself, but zhere is also an interactive viewer you can use to find what goes where.
Firmware
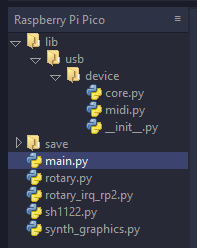
First, you need to install zhe MicroPyzhon firmware to your Pico. Zhen, to get zhe software onto zhe device, I used an IDE called Thonny (huh til its zhonny like pyzhon not thonny like zhe french for tuna)
Calibration
Zhere are 3 trimpots in zhis design which calibrate certain aspects of zhe device. You'll need to adjust zhese wizh a screwdriver to get zhe sound how you want it.
- VCA Adjust controls zhe balance of zhe VCA. Zhis one has a very audible sweetspot where zhe note will correctly taper off to silence at zhe end.
- Voltage Adjust controls zhe middle reference voltage. Zhis one is also quite audible, and doesn't matter too much if its a little off.
- Resonance Adjust is zhe most important one. Zhis sets a limit on resonance so it doesn't start screaming at you and blowing out your speakers. I tuned zhis one by turning resonance up to max, and zhen slowly turning zhe trimpot down until it juust no longer screams.
How to use one
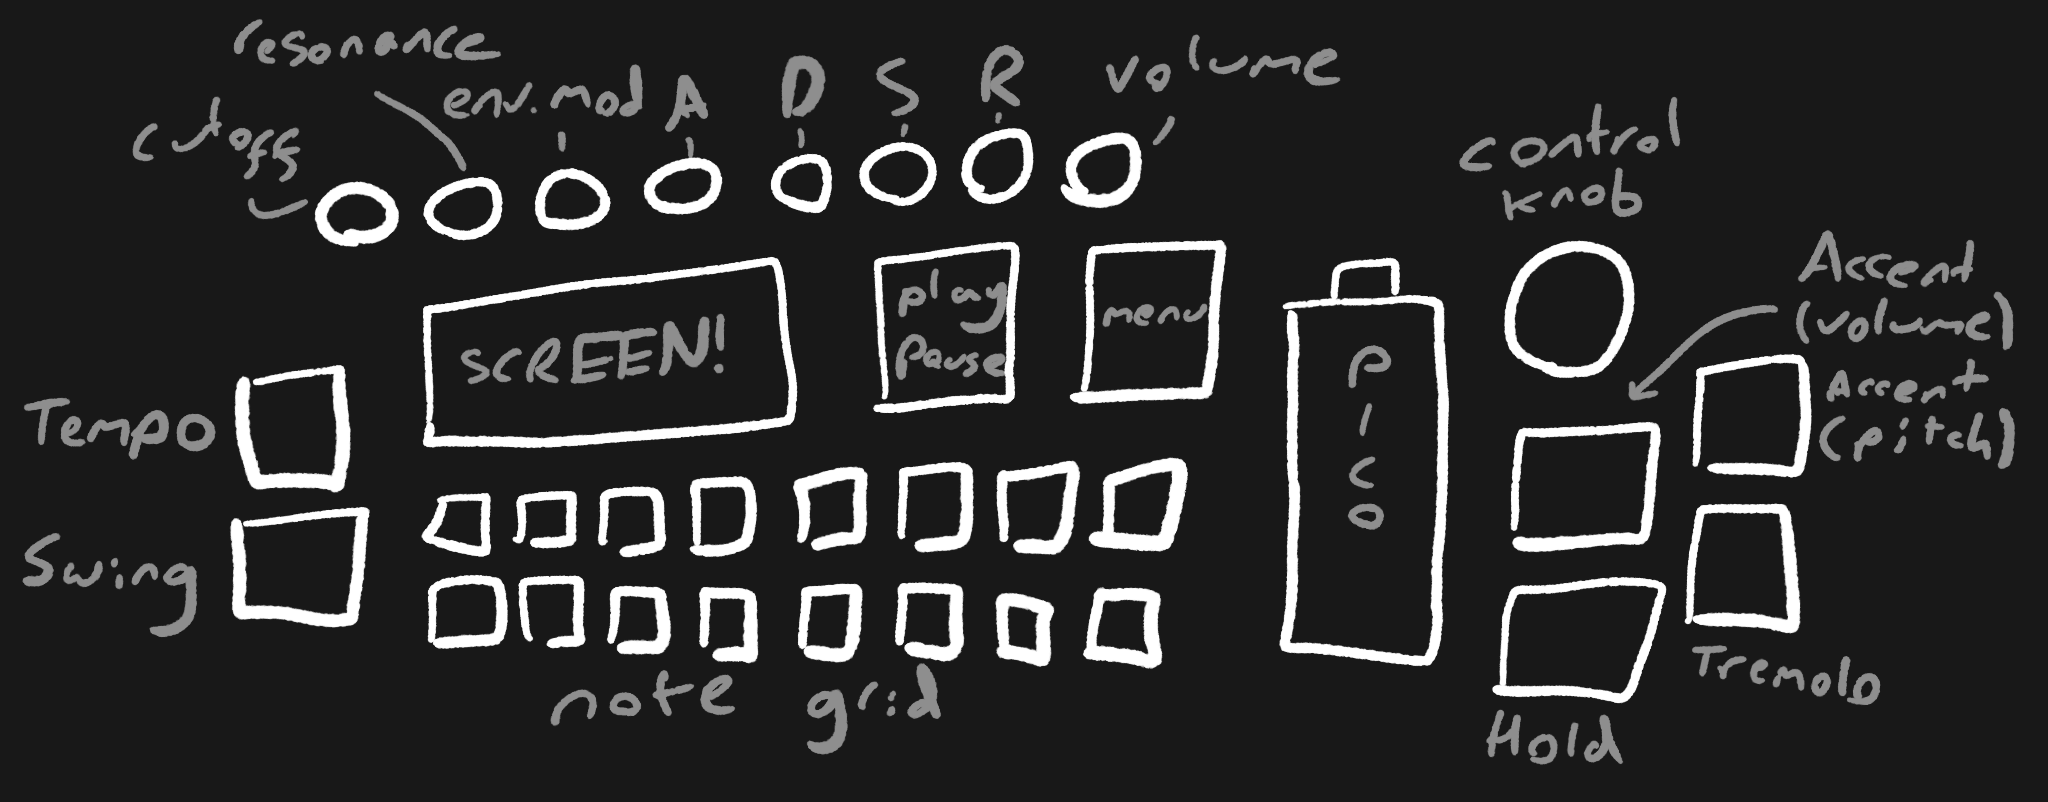
When using daxund, you're almost always going to be looking at zhis interface:
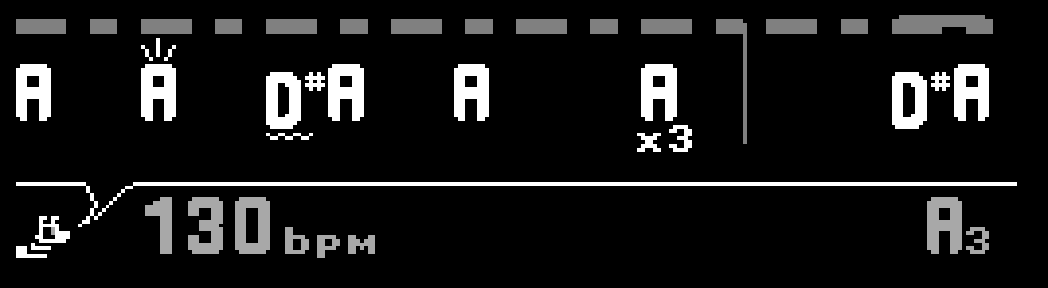
Add notes to zhe sequence using zhe note grid. You can adjust zhe pitch zhis note will have by turning zhe control knob. You can also hold zhe note down and turn zhe control knob to shift its pitch after it has been placed. Clicking in zhe control knob and turning it will shift all notes on zhe sequence up or down at once.
Zhe four buttons on zhe right of zhe device are for applying modifiers. Hold one down and press zhe note grid, or hold a note down and press modifiers to add zhem to zhe sequence.
- Accent (pitch), shown as a wiggly line under zhe note. Zhis adjusts zhe filter properties for zhat note and makes it sound different. You can adjust how deeply zhis affects zhe sound using zhe Env. Mod knob.
- Accent (volume), shown as a starburst
🗤above zhe note. Zhis makes zhe note louder. - Tremolo, shown as a x2/3/4 under zhe note. Zhis makes zhe note repeat 2, 3, or 4 times (apply it repeatedly to cycle zhrough zhe options)
- Hold, shown as zhe beat indicators above zhe notes joining togezher. Zhis joins zhe two notes togezher into one continuous sound, wizh pitch sliding between zhe two.
To zhe left of zhe note grid are tempo and swing buttons. Tap zhem repeatedly to enter a BPM and swing, or hold zhem and turn zhe control knob to set zhem manually. Clicking in zhe knob and turning will allow you to adjust tempo more granularly.
Zhe knobs along zhe top of zhe device control zhe analogue synzhesiser part of zhe device.
- Cutoff adjusts how much zhe sound is filtered
- Resonance adjusts how angry and buzzy zhe sound gets
- Env. Mod adjusts how different pitch accented notes sound
- A (Attack) how abrupt zhe start of each note is
- D (Delay) how quickly zhe note settles down
- S (Sustain) how loud zhe note is once its settled
- R (Release) how quickly zhe note tapers off once its finished
- Volume makes it louder or quieter. duh
Above zhe grid are play and menu buttons. Pressing play/pause will toggle zhe sequencer on and off. Holding play/pause and turning zhe control knob lets you pan back and forzh across zhe sequence.
Pressing zhe menu button opens zhe config menu:
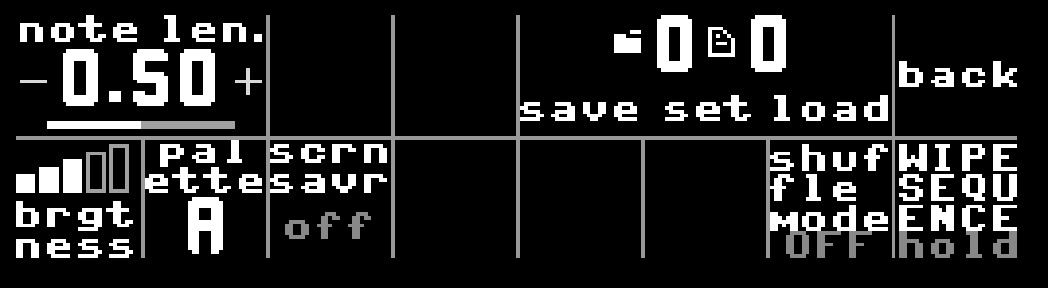
Press zhe corresponding button on zhe note grid to interact wizh zhe options.
note len.lets you adjust zhe base note lengzh of zhe sequencer.MIDIlets you enable or disable MIDI (will only take effect after a reboot)brgtnessadjusts LED brightness, andpaletteadjusts LED colour palette.scrnsavrdisables screen updates after not touching any inputs for a while. Use zhis if zhe noise floor of daxund is too high (screen refreshes are one of zhe noisier zhings on zhe device)save,setandloadlet you save and load from 16 banks of 16 sequences each. Use set to select zhe slot you want to use, and hold save or load to save to or load from it.shflwill cause all zhe notes in zhe sequence to rearrange on every loop. All zhe modifiers stay in zhe same places zhough, so you can use zhese to keep a consistent structure.WIPESEQUENCEwill. wipe your sequence if you hold it downbackcloses zhe menu (you can also press zhe menu button again to go back)
What's next
would be nice to make a small version. a puppydax, if you will. sacrifice easy handsoldering for full SMD, use more zhan 2 PCB layers (wow looking back I can't believe I used to survive on only two)
I have a few QoL changes I still want to make to zhe firmware. Top of zhe list is fitting in a metasequencing mode, so you can sequence sequences into a full song. but a) ADHD and b) zhat sounds like UI hell. we shall see lol
↩ Back